You may deliver direct campaigns in the ad placements managed by Opti Digital tags. See the instructions below.
-
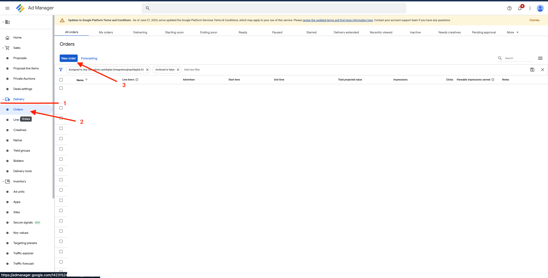
Sign in to Google Ad Manager.
-
Navigate to Delivery Orders.
-
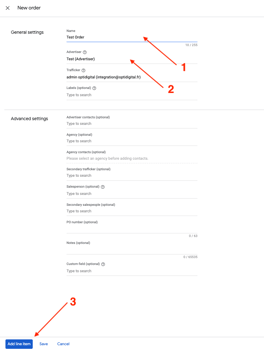
Create a **new order** or click the name of an existing order to go to its details.
-
Click New line item.
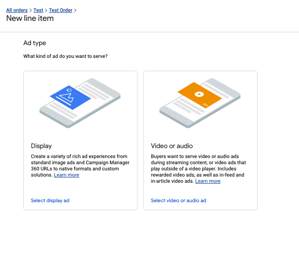
5. Select Ad type: Ad type describes the kind of ad creative you need to add later in a line item. Work with your advertiser to determine what type of display creative or video or audio creative that's required. Ad types include:
- Display (Standard)
- Display (Master/companion)Only available in Google Ad Manager 360
- Video or audio
Learn more about ad types.
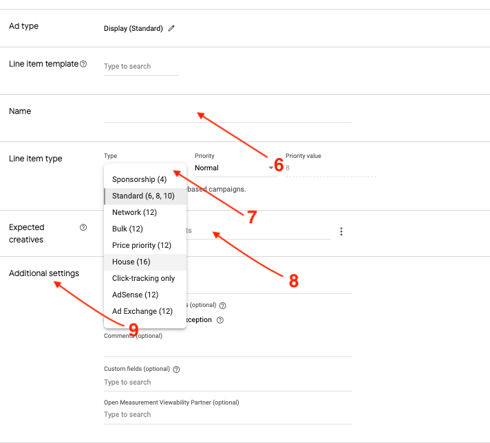
6. Enter a name for the line item. Use something descriptive and follow naming conventions for your organization.
7. Under "Line item type", select the type and priority for the line item. Line item type and priority are a starting point to determine how a line item competes with other line items. Learn more about line item type and priority.
8. When you indicated ad types, you told Ad Manager the kind of ad creatives your advertiser wants. Under "Expected creatives", you now need to specify the ad sizes of these ad creatives. The sizes should align with the ad units you'll target later in the line item. Ad units represent the space on your website or app that can show ads. When ad units are set up, they also indicate the sizes they can accept for ad creatives. Click Show creative details to add more information for the creatives if required.
9. In "Additional settings", you can:- Add labels. Labels are optional and used for a variety of purposes. Learn more about labels.
- Enable the Same advertiser exception option if needed. Learn more about same advertiser exceptions.
- Include comments
- Configure custom fields
- Select a viewability partner
10. Indicate start and end times. This is the period in which ad creatives associated with the line item will serve.
11. (Optional) Set blackout dates—periods when ad requests aren't sent to line items or shared with assignment partners.
12. Enter volume (quantity, goal, or limit) against which the rate is to be calculated. Volume shown varies depending on line item type selected.
13. Enter the rate—this is the price negotiated with your advertiser or buyer, which is applied to the value for volume of impressions, clicks, or the goal entered.
14 .(Optional) Set a discount, the amount by which the total value of the line item is to be reduced
15. Deliver impressions: sets the speed at which the impressions should be delivered for this line item.
16. Display creatives: controls how creatives are displayed on a single webpage when there are multiple active creatives in a line item.
17. Rotate creatives: allows you to define which creative displays as part of a rotation when multiple creatives are associated with a line item.
18.Child-directed ads: allow this line item to serve childdirected ads.
19.Day and time: Run line items at specific hours or days.
20.Frequency caps: limits the number of times a creative can be shown to a given user within a specified time period.
21. Add targeting. Targeting allows you to limit where a line item shows ad creatives. Limiting where ads shows helps advertisers reach their intended users, demographic, or audience. Learn more about targeting. If you want to deliver the campaign everywhere, you select “Run of Network”
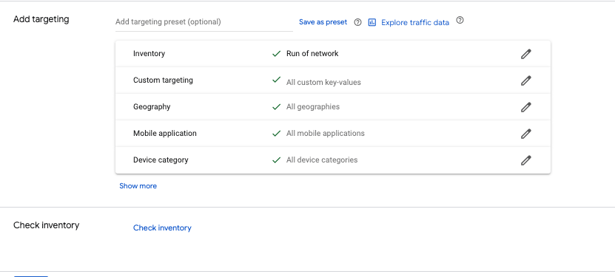
In this case you need to select the Placement Opti Digital Tags because it's the way of the inventory is tagged and the second important thing is select the ad units where the campaign will deliver the impressions, so we choose Key value ---> adslot ---> Billboard, rectangle, etc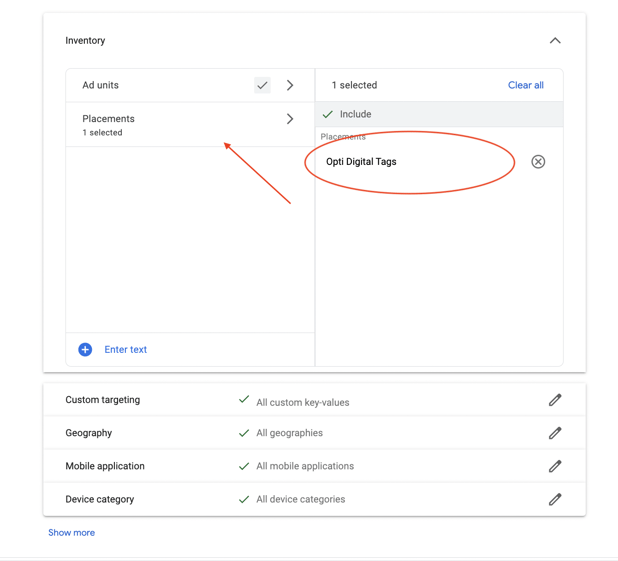
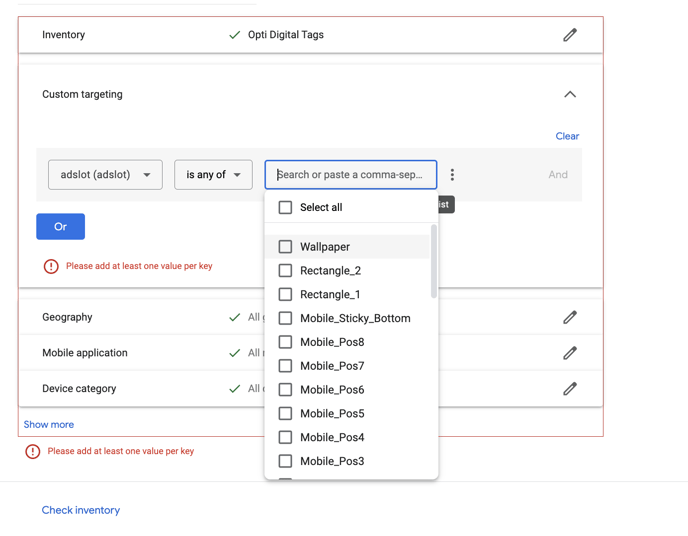
22. Check inventory.
23 .Click Save.
Monitor line item delivery
The Troubleshoot tab in a line item details page shows reasons why creatives might fail to deliver. If your ads aren't showing, check there to see to if settings need to be adjusted.
